Learning to ski is a wonderful thing. Not only is it great, fun exercise, but a brilliant way to spend time with your family and create unique memories, meet new people, and also a remarkable way to appreciate nature. But above all, it’s just a lot of fun!
But while learning how to ski can be daunting - it is considered an extreme sport, after all - there really is no reason to be nervous, especially as there are plenty of things to learn about skiing before you even hit the slopes, and we’re going to let you in on those tips!
From learning how to put on ski boots, to reading a piste map, and how to use different types of chairlifts, below you’ll find crucial information you need to know before your first skiing trip.
All You Need to Know About Ski Boots
Putting on ski boots: If you’re new to skiing and are having trouble putting your ski boots on, you are not alone. Many people do, but it doesn’t have to be this way.
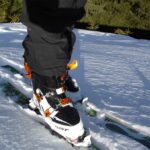
To put your ski boots on, start sliding your foot into the boot, stretching the plastic cuff and moving the boot liner’s tongue forward so you have as much space as you need. Give your heel a tap to make sure your foot is locked back in the heel pocket.
Then you can start to buckle your boots. Tighten the buckle first and then move up the boot. There’s no need to have the buckles too tight at this point.
Then, tighten the power strap around your shin. Now you can tighten the top two buckles so that the cuff of the boot is nice and snug.
You can place the waterproof gaiter on your salopettes over the top of your boots once they are done up. This helps to keep your feet dry.
To know if your ski boots are on properly, when you bend your knees your toes should come away from the front of the boot. Just like any new shoes (especially shoes as rigid as ski boots), your ski boots may feel a little strange when you first put them on, but they shouldn’t hurt.
Ski boots are supposed to be stiff and snug, so if you’ve bought the boots yourself or rented them, the boot-fitter should let you know how tight your ski boots should be.
More advanced skiers visit specialty ski-boot fitting shops to have their boots custom fitted for their feet. But this isn’t necessary for the average or beginner skier, any good quality ski hire shop will be able to provide you with what you need.
Walking in ski boots: While a lot of skiers experience difficulty walking in ski boots, pretty much always there isn’t an issue with the boot. It’s just a matter of learning how to walk in them. Walking in ski boots can feel a little strange! But there is a way to walk in them.
Simply plant your heel, roll forwards on to your toe and repeat: heel-toe, heel-toe. During apres-ski you may want to loosen up your boots by flipping up all your buckles to make your boots more comfortable.
It is a bit more difficult to walk up and down stairs in ski boots, but there is a simple way to do this. When walking up stairs, plant your foot on each step and when walking downstairs, use the same heel-toe movement that you use on flat ground.
However, if you find that neither of these methods is comfortable, you can try turning your body to one side and going up or down stairs slightly sideways.
Using a Lift Pass
Lift passes - or lift tickets, or ski passes - are integral to a skiing trip, and it’s important to know how to use them!
When skiing, your lift is your ticket to ride the ski lift system that lets you access all the slopes in the resort. There may be exceptions to a few free beginner lifts however, and these are often called ‘bunny hills’ or ‘nursery slopes.’
You can purchase lift passes from lift pass offices or reserve them online. They’re usually sold in multi-day, full-day, or half-day increments and can be purchased for different amounts of terrain on the mountain.
Beginner skiers won’t really need to buy the biggest pass on offer, and you can always ask the staff at the gate which pass is right for you.
Most ski passes these days are hands-free scanners, so you’ll need to know where the best place is to put your lift ticket. This is usually in any pocket on the left side of your body, such as your chest pocket in your ski jacket or your hip pocket in your salopettes. The main thing is that there is nothing else that is metallic in your pocket or nearby.
When you arrive at the lift station, walk slowly by the scanner and the turnstile should open up for you.
Another important thing to get from the lift pass office is your piste map.
Reading a Piste Map
A piste map may also be referred to as a ski map or a trail map, but either way it shows you how to navigate different ski areas.
Looking at a piste map is a bit daunting at first, and you may not know where to start. But no matter where you ski in the world, most resorts use similar systems.
Piste is a French name for ski trails or slopes, and is a term most commonly used in Europe. Pistes are categorized into four different difficulty ratings, each represented by a different color.
Green runs are beginner slopes, blue runs are intermediate slopes, red runs are advanced slopes, and black runs are expert slopes. However, in Austria and Switzerland the easiest trails are denoted with blue rather than green.
As well as indicating all the different ski runs, piste maps also let you know where other important locations are in the resort such as ski patrol huts, mountain restaurants, bathrooms, and different types of ski lifts linking all the slopes. Large resorts will also have big maps placed around the ski area showing you in real time which ski slopes and lifts are currently open.
How to Use Your Skis
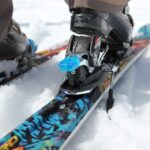
It may not seem like it, but there’s a lot of technology built into your skis. As a beginner however, you only need to be concerned with a few basic elements. These are the tip, the front of the binding (or the toe piece), the back of the binding (the heel piece), the edges, and the brake.
Carrying skis: A lot of people have difficulty carrying their skis, but hopefully our tips should make this a little easier!
Put the skis together base to base with the brakes overlapping. Place the skis over one shoulder with the brake of the higher ski inside the brake of the lower one. This prevents them from slipping apart.
Hold the skis on a slightly upward angle with the front of the binding behind your shoulder and the tips pointing downwards. Grab both of your ski poles with your free hand.
There is an alternative way to carry your skis if you find this method uncomfortable or difficult. Keeping the skis vertical, lock the sks together with the brakes, and lift them by the toe piece of the ski with the lower brake.
Getting in and out of skis: To get in and out of your skis, put them down on the snow at a right angle to the fall line (pointing across the hill, not down the slope). Take a ski pole in each hand and use them for balance, ensuring there is no snow stuck to the bottom of your ski boot.
Always start with the downhill ski, and slide the front ledge of your boot (the toe welt) underneath the toe piece of your binding. Make sure your heel is lined up with the cup of the binding’s heel and press down firmly. This causes the binding release lever to pop up with a snap. You can then repeat this process with your uphill ski.
While it feels like you are locked to your skis, your boots and bindings are designed to release the boot from the ski in case you fall. To unclip from your bindings just apply downward pressure to the binding release lever with your ski pole as you lift your heel.
Moving around on skis: When moving around on skis, it’s important to get used to the gliding feel underneath your feet, and the best place to get used to this feeling is on flat ground.
To get used to the new sensation start by lifting your feet up and down and sliding them back and forth. To move forward on the flat, keep your skis parallel, dig into the snow with both of your ski poles and push yourself forward. If you want to move more quickly or to go slightly uphill, use a motion similar to ice skating with your weight on the inside edge of your skis.
Stopping on skis: Another important aspect of learning how to ski is controlling your speed. Stopping with a snow plough position on your skis is the basic foundation of braking and turning.
Keep your upper body straight and apply pressure to the insides of your feet whilst moving your heels outwards so the tips of your skis point towards each other. Doing this lets you come to a complete stop.
While this is officially known as the snow plough position, it is sometimes called a ‘pizza’ due to the shape your skis make - that of a slice of pizza!
Using A Ski Lift
There are a few types of lifts you can use when skiing. Let’s take a look at what they are.
Drag lifts: Also known as button lifts, poma lifts, or t-bar lifts, drag lifts are commonly found in the beginner areas of ski resorts.
To begin using a drag lift, hold both your ski poles in one hand. The lift attendant will give you a drag pole which you need to grab with your free hand. Bend your knees and place it between your legs.
A lot of people make the mistake of sitting too far back, or being unprepared for the pull of the lift.
Chairlifts: These usually have panels informing you how many people the lift carries, or how tall you need to be to ride the life alone.
Push yourself up to the stop barriers and wait for them to open. Then stop in the marked area, take your poles in one hand and wait for the chair to come around.
When the chair gets close enough, bend your legs ready to sit down. As you pull away from the lift station, close the safety bar, then just sit back and enjoy the beautiful snowy views!
When you approach the top of the lift, raise the safety bar and start to shimmy forward slightly toward the edge of the chair. Keeping your skis parallel, stand up once they’ve made contact with the snow and continue on in a straight line.
There’s no need to worry about falling. If you do fall, the lift attendant will stop the lift so the skiers behind you won’t run into you.
Gondolas: These are the easiest types of ski lift. Gondolas have racks outside to take skis or snowboards, so once you’ve placed your skis in the rack, just walk in and sit down.
Best Beginner Ski Resorts
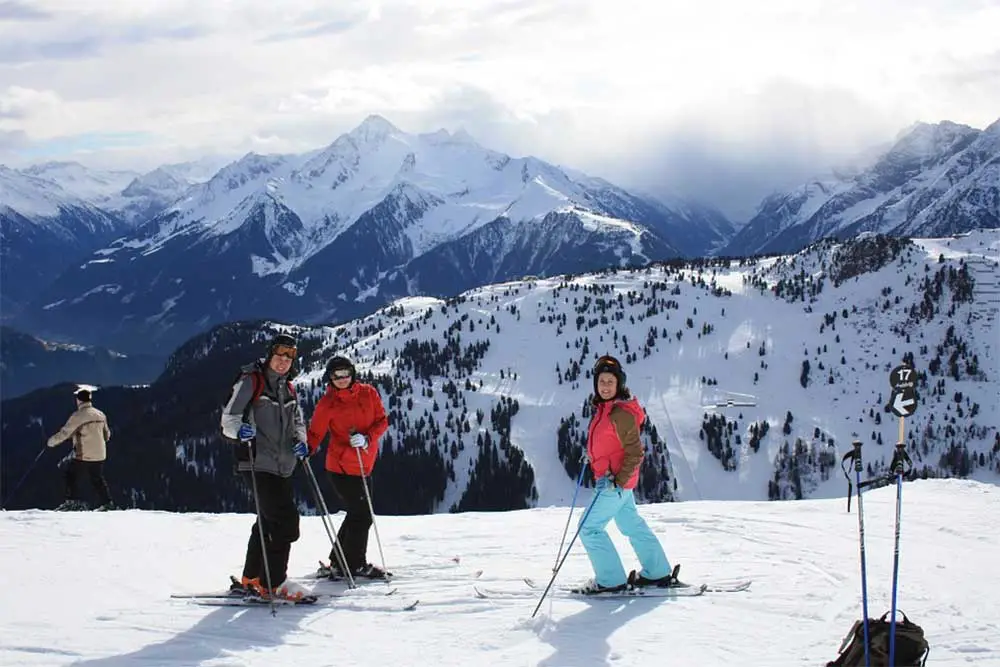
While most resorts are very accommodating to beginner skiers, choosing the right resort can make a big difference to your first ski experience. After all, a bad experience isn’t going to exactly make you want to try skiing again! Let’s take a look at a couple of the most beginner-friendly resorts.
La Rosiere (France): An underrated resort, La Rosiere is a beautiful, purpose-built Savoyard ski resort with 160km of varied runs.
With a top lift reaching an altitude of 2800m it’s incredibly snowy, but its location in southeastern France makes it very sunny too. The perfect conditions for learning!
You won’t have to leave the village to learn, as there is a beginner’s area just a couple minutes walk from the town centre. You won’t have to stray too far for things to do, as the Roches Noires lift gives you access to everything you need.
Most of the runs here on the lower ski slopes are light blues. This combined with the large beginner’s area in town means that progress is easy and fast to achieve.
These simpler runs are also a good distance away from the steeper terrain up higher, so you won’t have to worry about speedier skiers whizzing past you while you’re finding your feet. The beginner slopes hardly ever feel crowded.
Solden (Austria): You’ll find plenty of short runs in Solden to warm up on before the big descent. Trust us, you could spend all day on the Giggijoch with its scenic views.
There is also a slightly longer all blue route from the Schwarze Schneid, linking #33 and #30 and that takes you to the Hühnersteign for soothing hot chocolate or a punchy ‘Cabin Coffee.’
If you want to take some ski lessons while in Solden, then you’re in luck! There’s plenty of brilliant ski schools ready to help you nail the basics for your skiing adventure. These schools include Snowlines Ski and Snowboard School, Vacancia Ski, and Snowboardschule.
Livigno (Italy): Tucked in the valley between the Mottolino and Carosello ski areas, Livigno has an intriguing history. Due to its well-concealed location, a couple of centuries ago tax collectors didn’t want to brave the snowy mountain passes in order to get to Livigno, so declared it tax-exempt.
The main beginner’s area is located just outside Livigno, and their nursery slopes are not too far from the shops.
You also won’t have to set foot on a lift for your first turns, but you can find beginner-friendly lifts at Lift 18 (Doss) and Lift 17 (San Rocco). Lift 18 has a lift resembling a magic carpet/travelator as well as a small drag lift, while Lift 17 has both a chairlift and a drag lift.
Once you’ve moved on from the bunny slopes, there are plenty of beautiful blue slopes to turn your skis too! Livigno doesn’t incorporate green runs in its grading system, so blues are the easiest.
Once you’ve got your ski legs and are looking for a challenge, an exciting run is the meandering 7km long descent from The Mottolino area.
Conclusion
Hopefully our tips will prepare you for your first ski trip, and we hope that you’re feeling a bit more confident about hitting the slopes. Skiing may seem daunting at first, but it really is an incredible, addictive pastime that we’re sure you’ll fall in love with.
To ensure a lifetime of great skiing, book some professional ski lessons and book a stay in a beginner-friendly ski resort. With our tips in mind too, you’ll be finding your ski legs in no time!
- Types of Skiing Terrains: A Comprehensive Guide for Every Skier - December 6, 2024
- Skiing Nutrition: Essential Nutritional Advice and Meal Planning for Skiers - August 15, 2024
- Backcountry Skiing Explained: Essential Tips and Gear - August 8, 2024


